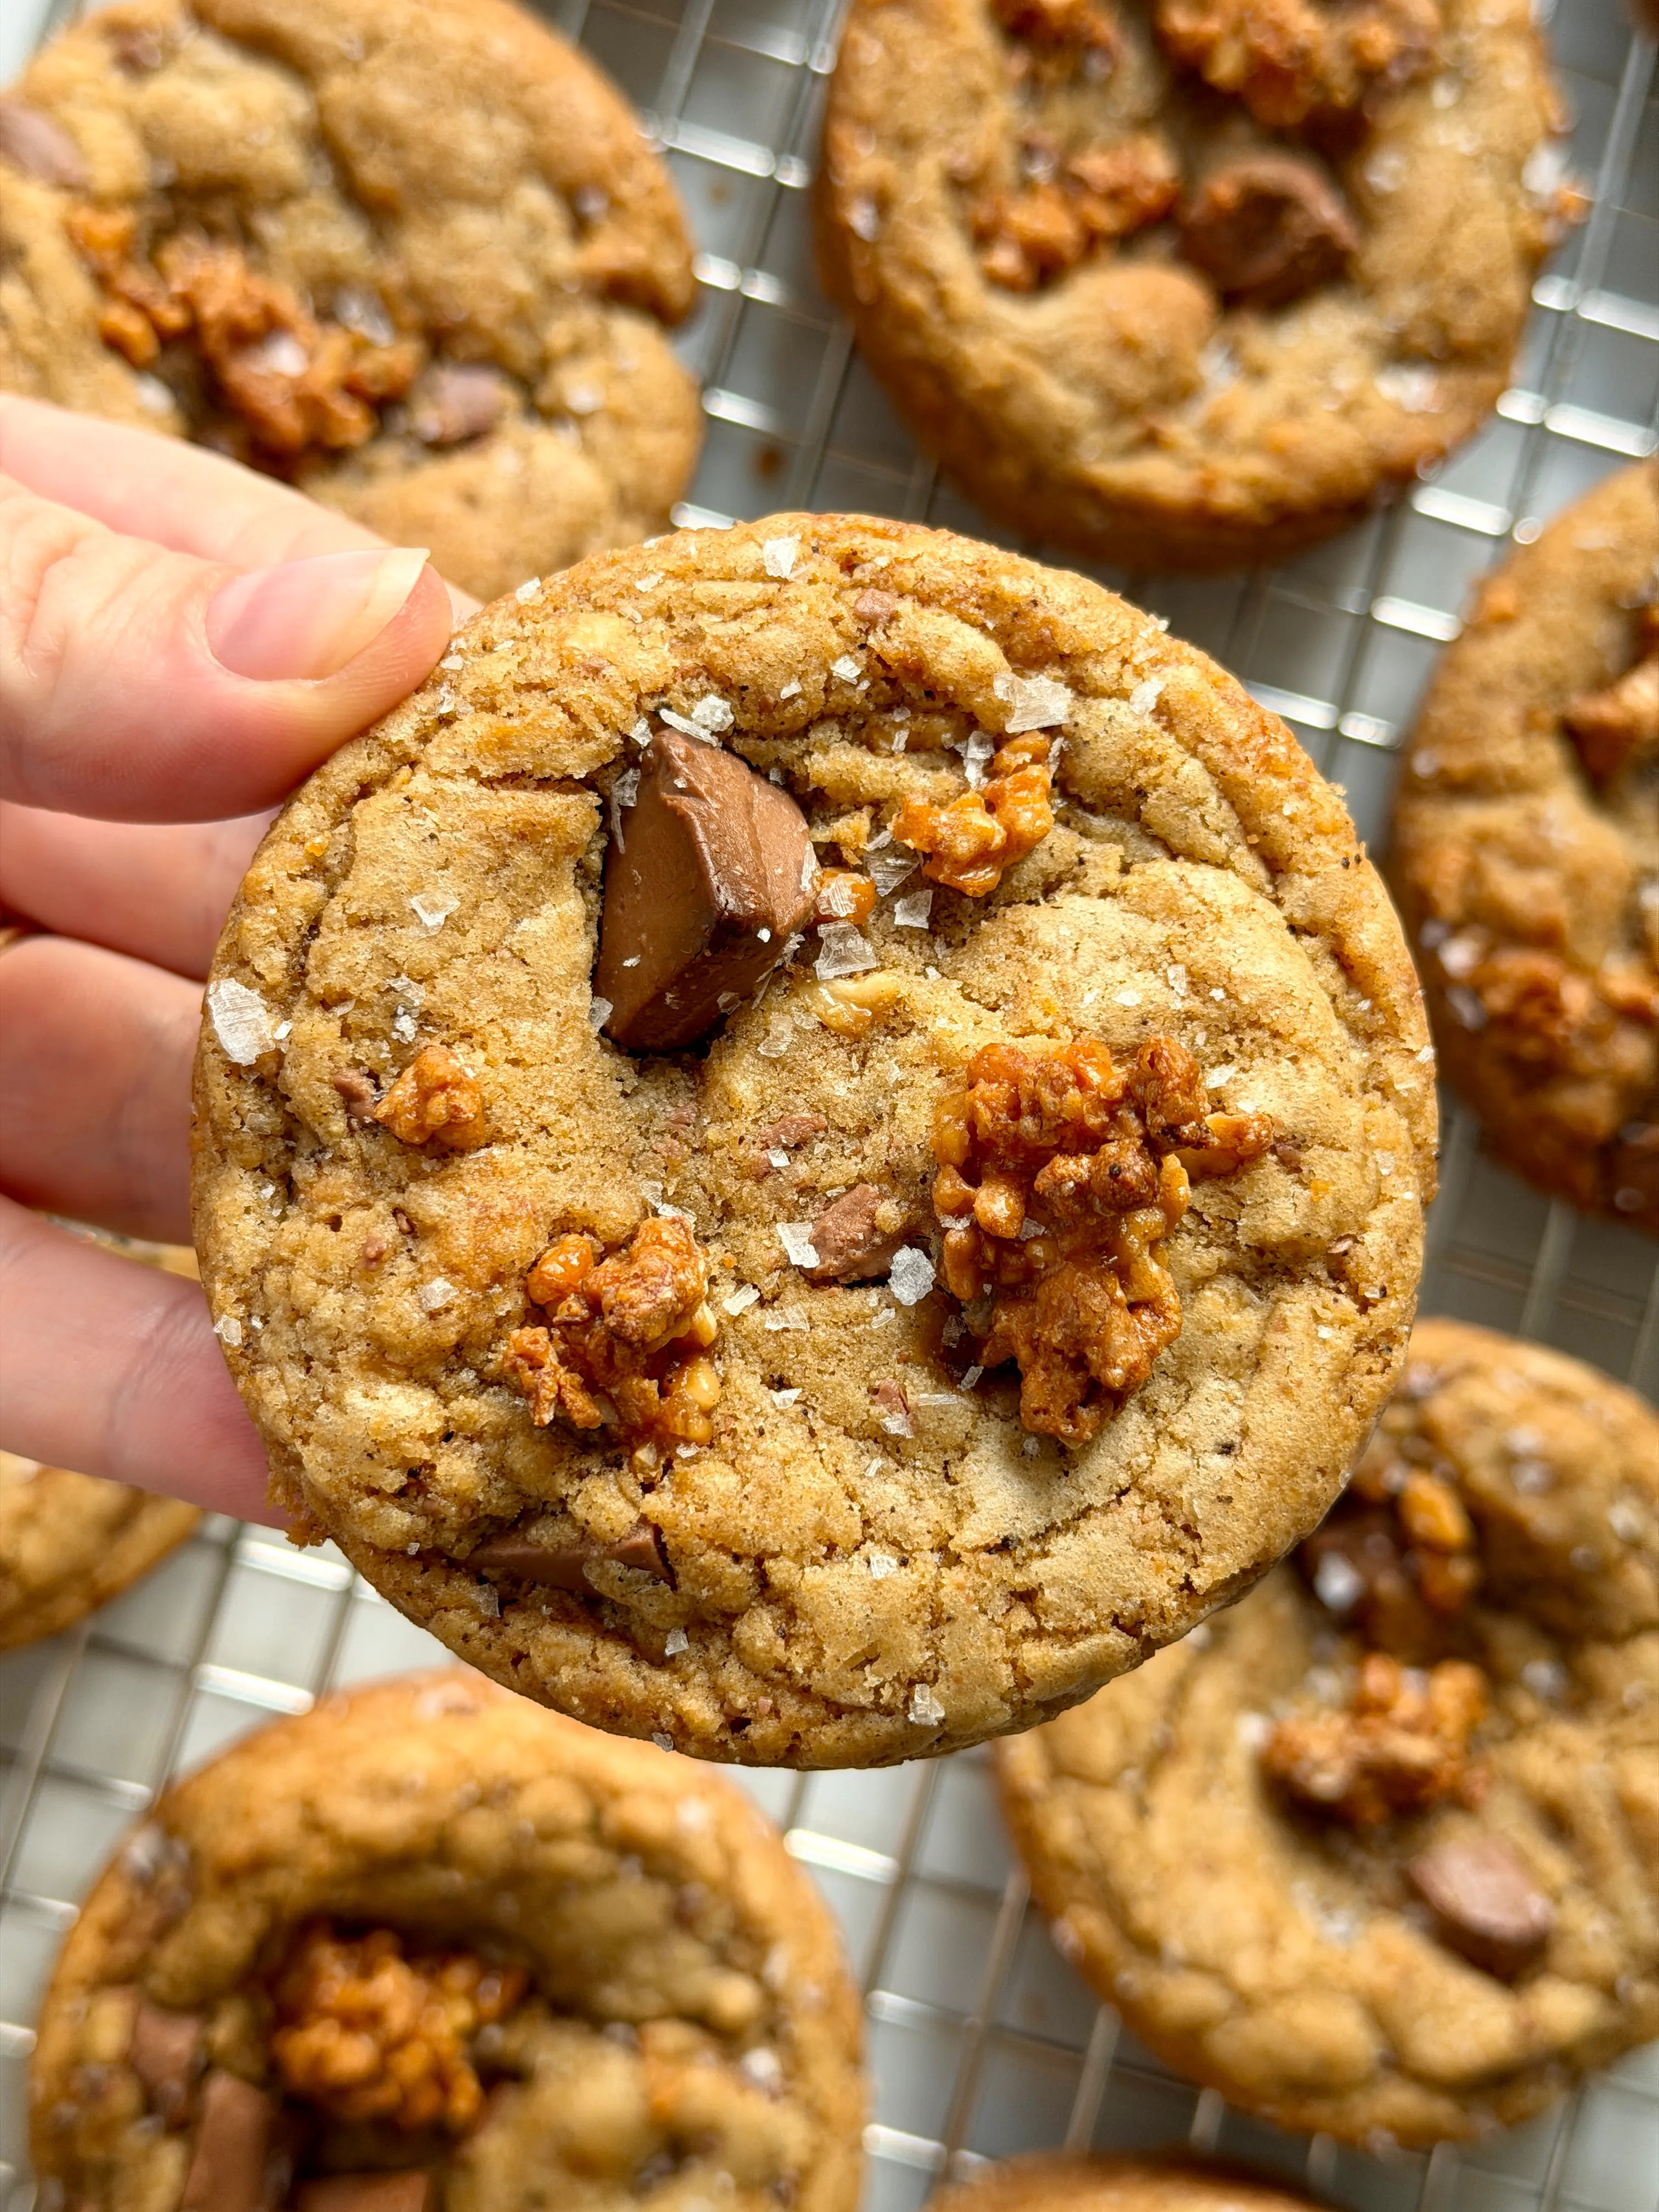
Brown Butter, Caramelised Hazelnut & Milk Chocolate Cookies
I’m on a mission to create the perfect cookie and I fear it may be a short mission, because we might have already achieved it. Baking, and cookies in particular, are a scientific endeavour and as a self-proclaimed woman in STEM I am slightly obsessed with the ratios of ingredients and how they affect the final bake. This particular recipe has been perfectly engineered to create a cookie that is crisp around the edge, but importantly with a nice chew, and a slightly gooey centre. We achieve this by balancing brown butter, 2 types of sugar, eggs and egg yolk, flour and raising agents. These are also baked in crumpet rings, which not only improves their shape but allows them to stay thick without being cakey, and to have that perfectly crisp chewy edge. I am head over heels for this bake!
Hello readers! I'm Eleanor..

If you like this recipe, make sure to follow me on my socials for more!
More like this

Why I Created This Recipe
I am on a mission to create the perfect cookie, and I fear it may be a short one — because I think we might have already got there.
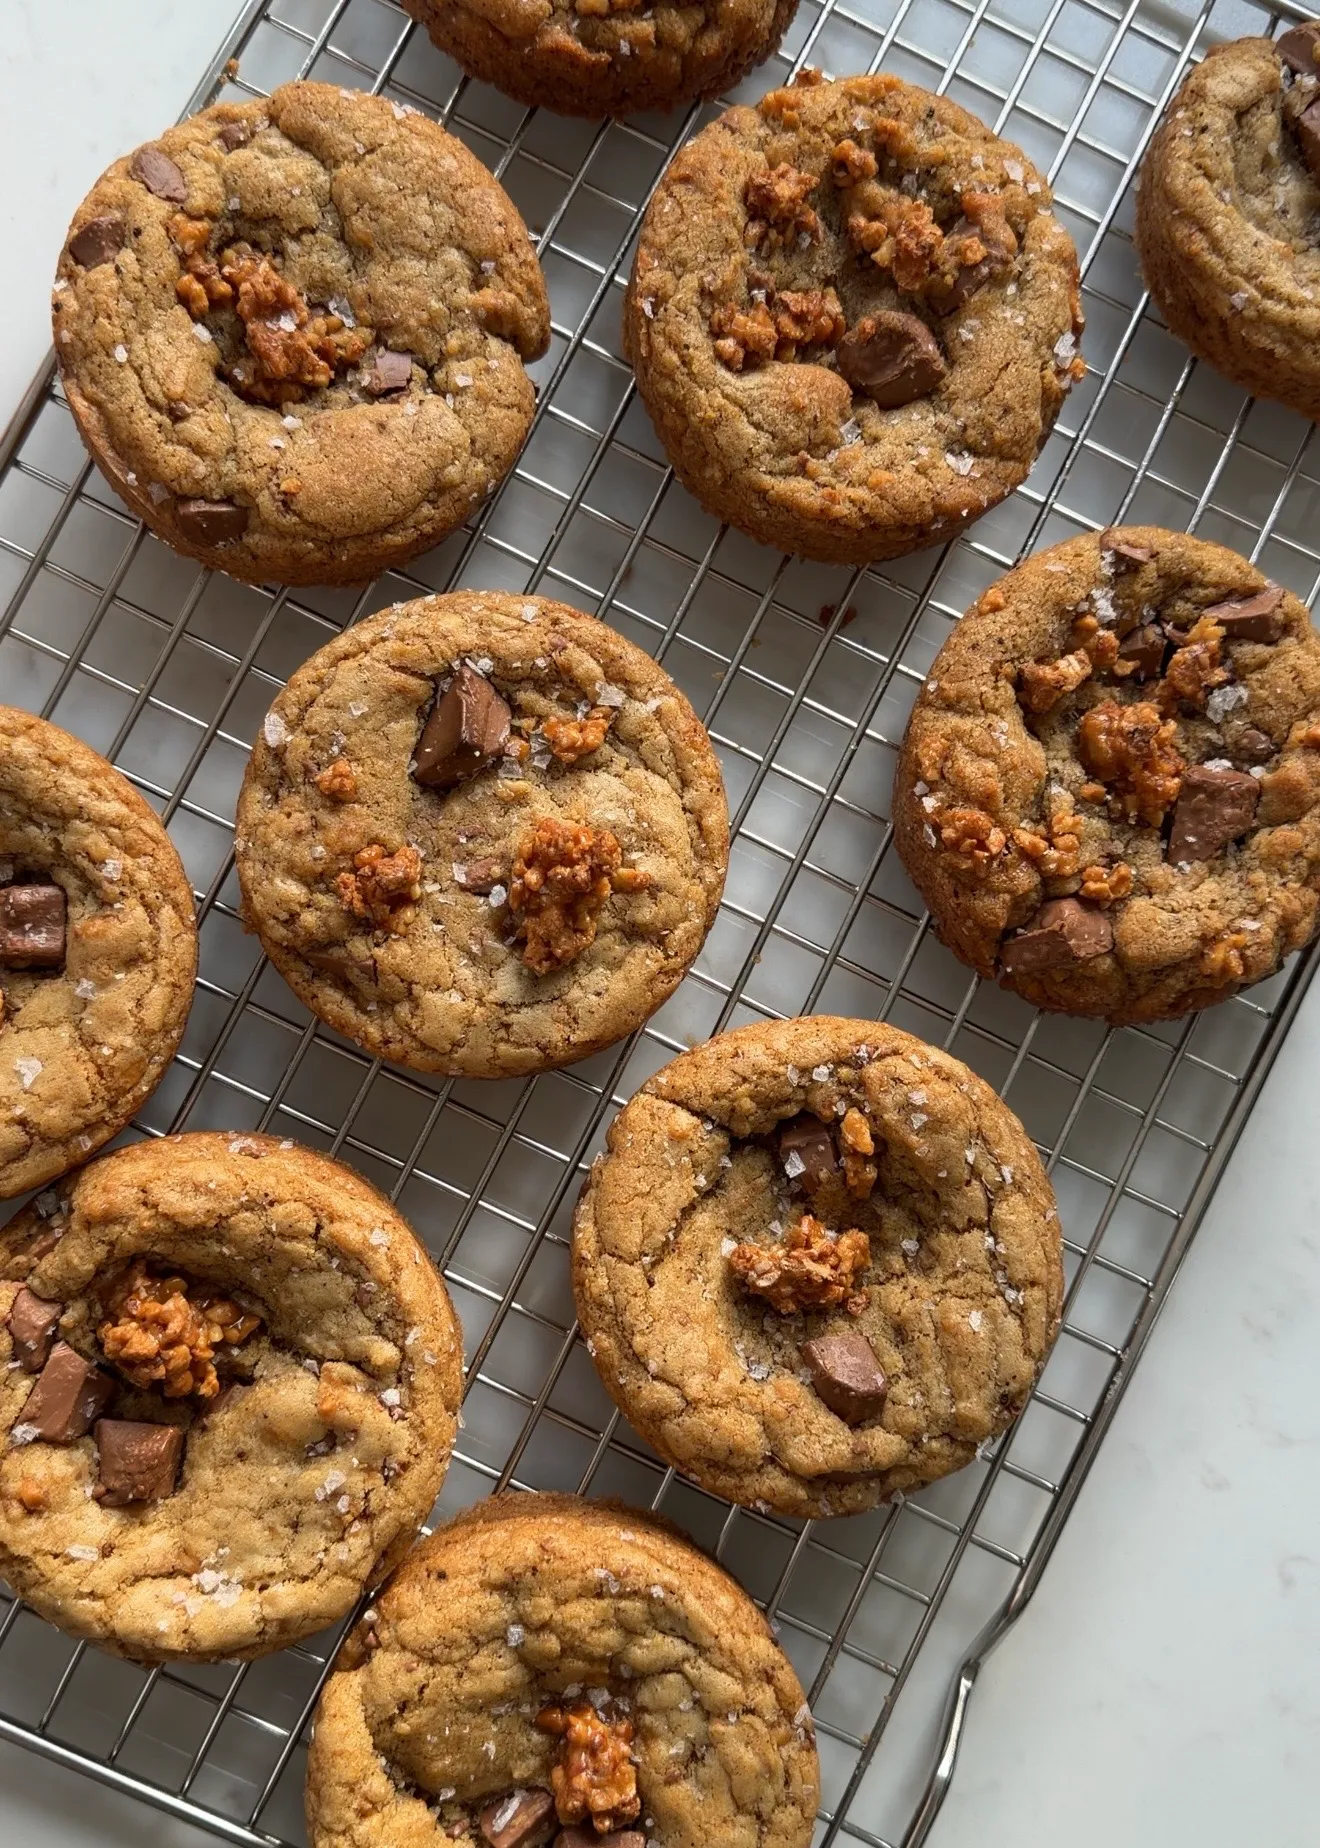
Baking, and cookies in particular, are a scientific endeavour. As a self-proclaimed woman in STEM, I am slightly obsessed with the ratios of ingredients and how they affect the final bake. Every decision in this recipe - the type of fat, the temperature at which it is used, the ratio of brown to white sugar, the balance of whole egg to yolk, the combination of raising agents - was made deliberately, with a specific result in mind. That result is a cookie that is crisp around the edge, with a satisfying chew, and a centre that is ever so slightly gooey. Not cakey, not flat, not greasy. Just right.
The crumpet rings hold the dough in place during baking, allowing the cookies to stay thick without becoming puffed and cakey, and giving that perfectly defined, crisp and chewy edge. I am completely head over heels for this bake, and I think you will be too.
The Science of the Perfect Cookie
Baking a great cookie is not guesswork. Every ingredient has a job and the balance between them is what separates a thick, fudgy cookie from a thin, crisp one, or a chewy one from a cakey one. Here is exactly what each ingredient is doing in this recipe, and why the ratio was chosen to produce the cookie described above.
Butter = Fat, Flavour, Spread and Temperature
Butter brings flavour, tenderness and spread. The fat coats the flour and limits gluten formation, which keeps the cookie tender rather than bready. Butter is also around 15–18% water, which turns to steam in the oven and gives a little lift. As it melts, the dough relaxes outwards, so more butter means more spread, richer flavour and crisper, lacier edges.
The temperature of the butter matters as much as the amount. Cold butter, cubed and barely mixed in, melts later in the bake meaning the cookie sets before it can spread, which is the technique behind those thick, bakery-style cookies. Softened, creamed butter traps air, giving an initial puff, then more spread and a lighter, cakier crumb. Melted butter holds no air at all, giving a dense, chewy, flatter cookie.
This recipe uses browned butter which adds a deep nuttiness and a caramel quality that melted butter alone cannot give, but which loses some of its water content during browning. To compensate for that lost moisture and fat, this recipe uses two extra egg yolks alongside the whole egg, which restore the richness and fudginess without the water that would make the dough too wet.
White Sugar = Crispness, Spread and Snap
White sugar controls crispness and spread. Sugar liquefies in the oven, which makes it a major driver of spread. White sugar also recrystallises as the cookie cools, which is what gives a snap and crisp edges. It caramelises for colour and flavour, and more of it means a flatter, crisper cookie that turns crunchy as it cools.
In this recipe, the white sugar — caster sugar (superfine sugar) — is used in a supporting role. At 60g against 195g of brown sugar, it is present in a roughly 1:3 ratio, providing the crisp, defined edge without dominating.
Brown Sugar = Chew, Moisture and Depth
Brown sugar controls chew, moisture and depth. It is white sugar coated in molasses — around 3.5% for light brown sugar — and that molasses changes three things. First, moisture: molasses attracts and holds water, so brown sugar gives a softer, chewier centre that stays soft for days. White-sugar cookies go stale by going crisp; brown-sugar cookies stay bendy. Second, acidity: molasses is slightly acidic and reacts with bicarbonate of soda (baking soda), which gives lift and faster browning. Third, flavour and colour: brown sugar brings toffee and caramel notes that work particularly well alongside chocolate and browned butter. This recipe uses 195g of light brown sugar against 60g of caster sugar — a 3:1 ratio that firmly prioritises chew and moisture over crispness.
Eggs and Egg Yolks = Structure vs Fudginess
Whole eggs add structure and puff. The white is mostly water and protein — the protein sets in the oven and gives structure, while the water makes steam and helps gluten develop. More whole egg means a puffier, cakier, drier cookie that holds its shape but loses fudginess.
Egg yolks add richness and fudginess. A yolk is about a third fat and contains lecithin, an emulsifier that keeps the dough smooth and cohesive. Yolks add richness, tenderness, chew and colour without the cakiness that whites bring. Swapping a whole egg for two yolks is one of the most reliable ways to push a cookie towards dense and fudgy — and that is exactly what this recipe does.
One whole egg provides the minimum structure needed for the cookie to hold together; the two additional yolks push the texture firmly towards rich, fudgy and chewy without tipping into cakey. Combined with the browned butter, this egg ratio is central to the texture this recipe achieves.
Plain Flour = Structure and Thickness
Plain flour (all-purpose flour) provides the structural backbone of the cookie. The gluten that forms when flour and liquid are mixed is what holds the cookie together as it bakes and prevents it from spreading into a puddle. More flour means a thicker, more structured cookie; less flour means more spread and a chewier, flatter result.
At 300g against 225g of butter and three eggs, the flour ratio in this recipe is on the higher side — deliberately so. This is what gives the cookies their thickness and their ability to hold their shape in the crumpet rings without becoming cakey. The fat from the butter and yolks keeps the gluten tender; the flour provides the structure.
Raising Agents = Lift and Spread
This recipe uses both bicarbonate of soda (baking soda) and baking powder, in a precise and deliberately imbalanced ratio: just ¼ tsp bicarbonate of soda against 1 tsp baking powder.
Bicarbonate of soda reacts with the acidic molasses in the brown sugar to give spread, browning and a slight chew. Baking powder — which contains its own acid — gives a more neutral, controlled lift without the spreading effect of soda. Using more baking powder than soda gives the cookies a gentle lift and a slightly more open crumb without the excessive spread and browning that too much soda would create. The result is a cookie that has just enough height without puffing up into a cake.
The Crumpet Ring
Crumpet rings are the technique that ties everything together. Placed on the baking tray before the dough goes in, the 9cm rings act as a mould — holding the dough in place as it bakes so it cannot spread outward, which forces it upward instead. The result is a cookie that is thick and defined without the dense, cakey texture that a very thick cookie can otherwise develop.
The rings also concentrate heat around the edge of the cookie, which is what creates the characteristic crisp, chewy ring at the perimeter — browned more intensely than the centre, with a texture that is almost biscuit-like while the inside remains soft and gooey. Remove the rings straight from the oven while the cookies are still hot — they will hold their shape perfectly as they cool.

How to Brown Butter
Browning butter is one of the most transformative techniques in baking — it takes around five minutes, requires no specialist equipment and adds a depth of flavour that regular melted or softened butter simply cannot replicate. Here is exactly how to do it.
Add the butter to a saucepan. Place over a medium heat and let the butter melt, stirring or swirling occasionally. As it melts and the water evaporates, it will begin to foam — this is normal and means the process is working.
Keep cooking. The foam will subside slightly and the butter will begin to turn golden. At this point the milk solids in the butter are starting to brown and the Maillard reaction is creating the nutty, caramel compounds that make browned butter so distinctive. The colour will deepen from golden to amber — keep going. The moment it reaches a deep amber colour and smells intensely nutty and toasty, take it off the heat immediately and pour it into your mixing bowl. It will continue to cook in the residual heat of the pan if you leave it there, and the difference between perfectly browned butter and burnt butter is a matter of seconds.
A few things to watch for: the foam can make it difficult to see the colour of the butter beneath — swirl the pan or stir to check. The milk solids at the bottom of the pan will be darker than the butter itself and will smell nutty rather than bitter. If they smell bitter or acrid, it has gone too far.
About the Caramelised Hazelnuts
The caramelised hazelnuts are made by making a simple praline made by cooking chopped hazelnuts with sugar and water until deeply golden and glossy. The process takes around 10 minutes.
The sugar and water go in together with the chopped hazelnuts from the start, which gives a more even caramelisation than dry-roasting the nuts first and coating them afterwards. Cook over a medium heat, stirring frequently, until the sugar has dissolved, the water has evaporated and the caramel has turned a deep, even golden amber. Pour immediately onto baking paper (parchment paper) — the caramel will harden and the praline will be ready to break into pieces once completely cool. Do not touch it while it is hot.
Once cool, break or chop the praline into irregular pieces. The mix of sizes — some fine and crumbly, some larger and more substantial — gives the best textural result in the finished cookies.

My Top Tips for the Perfect Brown Butter Cookies
- Brown the butter carefully and attentively — it goes from perfect to burnt in seconds. Use a light-coloured pan, watch constantly from the moment the foam subsides and have the mixing bowl ready to pour into the moment it reaches the right colour. See the full method in the section above.
- Pour the browned butter into the mixing bowl immediately after browning. Leaving it in the hot pan even for a minute will continue cooking it — the residual heat of a metal pan is enough to take it from amber to bitter.
- Whisk the sugars into the warm browned butter while it is still liquid. This dissolves the sugar partially and gives a smoother, more cohesive dough than adding it once the butter has cooled and solidified.
- Add the eggs once the butter and sugar mixture has cooled slightly — warm but not hot. Too hot and the eggs will begin to cook on contact, which will scramble them rather than incorporate them smoothly.
- Whisk the eggs in vigorously until the mixture looks smooth and slightly glossy before adding the flour. Under-mixed eggs will give an uneven texture in the finished cookie.
- Do not over-mix once the flour goes in. Mix until just combined — a few streaks of flour are fine and will disappear as the dough comes together. Over-mixing develops gluten and can make the cookies tough.
- Chill the dough while the praline cools — around 30–45 minutes total. Chilled dough spreads less in the oven, which helps maintain the thickness that the crumpet rings are designed to preserve.
- Make the praline first so it has maximum time to cool before the dough is ready. Hot praline added to chilled cookie dough will soften it.
- Break the praline into irregular pieces of varying sizes before folding into the dough. A mix of fine praline crumbles and larger chunks gives the most interesting texture in the finished cookie.
- Place the crumpet rings on a lined or non-stick baking tray. No greasing is needed — the fat content of the dough is sufficient. Use a 9cm crumpet ring for each cookie.
- Use one generous ice cream scoop of dough per ring — the dough should fill the ring to roughly halfway. Do not press it down; it will spread naturally during baking.
- Remove the crumpet rings immediately when the cookies come out of the oven. Do not wait for them to cool — the cookies will hold their shape perfectly and the rings will lift off cleanly while everything is still hot.
- Finish with a light scatter of flaky sea salt the moment the rings come off and before the cookies cool. The salt adheres best to a warm surface and its flavour is most pronounced when it dissolves very slightly against the warm cookie.
- Leave to cool on the tray for at least 10 minutes before eating — the centre will set as they cool and the texture will be considerably better than a cookie eaten straight from the oven.

Storage
Store in a sealed airtight container at room temperature for up to five days (but they're really best on day 1 or 2).
Freezing the Dough
The cookie dough freezes exceptionally well before baking. Scoop into individual portions, place on a lined tray and freeze until solid, then transfer to a sealed freezer bag. When ready to bake, place frozen dough portions directly into the crumpet rings and bake from frozen at 180°C, adding three to four minutes to the baking time. This means freshly baked cookies are available on demand from the freezer — which is, frankly, one of the best things about this recipe.
Frequently Asked Questions
Do I need crumpet rings to make these cookies?
You do not need them, but they make a significant difference. Without crumpet rings the cookies will spread more freely and will be thinner, flatter and less defined at the edges — still delicious, but not the same result. Crumpet rings are inexpensive and widely available online and in kitchen shops. They are also useful for making crumpets, English muffins and perfectly round fried eggs, so they earn their cupboard space.
Why does this recipe use brown sugar and caster sugar rather than just one type?
Because each type does something specific and different. Brown sugar controls chew, moisture and depth — the molasses keeps the centre soft and gives toffee and caramel flavour. Caster sugar (superfine sugar) controls crispness and spread — it recrystallises as the cookie cools to give the crisp, defined edge. Using only brown sugar would give a soft, chewy cookie with no crisp edge; using only white sugar would give a flat, crisp cookie with no chew. The 3:1 ratio of brown to white in this recipe is specifically calibrated to give both. See the full ingredient science section above for more detail.
Why brown butter rather than melted butter?
Browned butter adds a deep nuttiness and caramel complexity that regular melted butter cannot provide — the milk solids toast during browning and create new flavour compounds through the Maillard reaction. In a cookie with chocolate and caramelised hazelnuts, that nuttiness is particularly at home. Regular melted butter would work but the depth of flavour would be noticeably less complex. See the full browning method in the section above.
Can I skip chilling the dough?
Technically yes, but the result will be different. Chilled dough spreads more slowly in the oven, which gives the cookie more time to set before it has spread too much — helping to maintain the thickness that the crumpet rings are designed to preserve. Unchilled dough will spread more aggressively and the final cookie will be slightly thinner. The 30–45 minute chill is not long, and the praline-making time fills it naturally.
How do I know when the cookies are done?
The edges should be lightly golden and set; the centre should still look very slightly underdone and soft when you take them out. This is correct — the cookies will continue to set as they cool, and a cookie that looks perfectly done in the oven will be overdone once cool. If the centre looks completely set in the oven, they have gone too far.
Ingredients
Makes 8-10 Cookies:
225g Salted Butter
195g Light Brown Sugar
60g Caster Sugar
2 Tsp Vanilla Extract
1 Whole Egg + 2 Egg Yolks
300g Plain Flour
1/4 Tsp Bicarbonate of Soda
1 Tsp Baking Powder
1/4 Tsp Sea Salt
65g Chopped Hazelnuts
65g Caster Sugar
50ml Water
160g Milk Chocolate, chopped
Flaky Sea Salt
Instructions
1. Add the butter to a pan over a medium heat and brown, following the instructions above until deep and nutty.
2. Once brown, add to a bowl with the light brown sugar and caster sugar. Whisk until combined and leave to cool slightly. Then add the egg, egg yolks and the vanilla. Whisk again until smooth.
3. Add the plain flour, bicarbonate, baking powder and salt and mix until combined. Chill in the fridge while you caramelise the nuts.
4. Add the chopped hazelnuts, sugar and water to a pan over a medium heat. Cook, stirring frequently until the sugar has dissolved and begins to caramelise. It will be ready when it’s a deep golden colour. Pour onto a sheet of baking parchment and allow to cool completely.
5. Preheat the oven to 180ºc.
6. Mix the chocolate and nuts through the cookie dough then scoop 1 ice cream scoops worth into crumpet rings on a baking tray.
7. Bake for 12-15 minutes until lightly golden. Remove the rings and place on a cooling rack, finishing with a little flaky sea salt.
Like this recipe?
If you like this recipe, you'll love my cookbook! Full of delicious meals for all types of occasions, there's something for everyone
Meal Plans & More...
Subscribe to my newsletter for weekly meal plans, for one! I select 5 one pot one portion recipes that use similar ingredients and include your shopping list plus recipe notes, ingredient swaps and tips and tricks for using up leftovers. Take a look at the first one here...
Ginger Chicken Rice Bowl
Usually I would consider a brothy meal that you eat with a bowl and a spoon a form of comfort food, however, the flavours in this dish are so fresh and vibrant that it has to go in this chapter. I love the fiery freshness of ginger and it’s the predominant flavour in this rich chicken broth. The finished dish isn’t a soup as such, but there is just enough broth to make every mouthful deliciously juicy. It also takes minimal time to make so it’s a useful recipe to have on hand for days when you’re short of time.

Curried Chicken Skewers with Satay Slaw
I have an affinity for crunchy slaws, as I think they provide more interest, more texture and are more filling than many other salads. However, I’m not partial to excessive quantities of mayonnaise. Here I opt for coconut milk instead, which delivers the same creaminess in a less monotonous way. The fresh coriander and bite of roasted peanuts keep this slaw lively and interesting and are perfect with the lightly charred curried chicken skewers. This would also be great sandwiched between a burger bun, or on a soft flatbread.

Creamy Green Linguine
In a way, this linguine changed my life. It was the first recipe in the series to take off on social media, bringing new people and new opportunities into my life. It’s an exceptionally simple recipe that uses the same water to cook both the pasta and the vegetables, which you then use to create a velvety, carbonara-esque sauce with the cheese and egg. I’ve retested this and tweaked it since its original conception and, though I can’t promise it will change your life, I can promise it will be delicious.

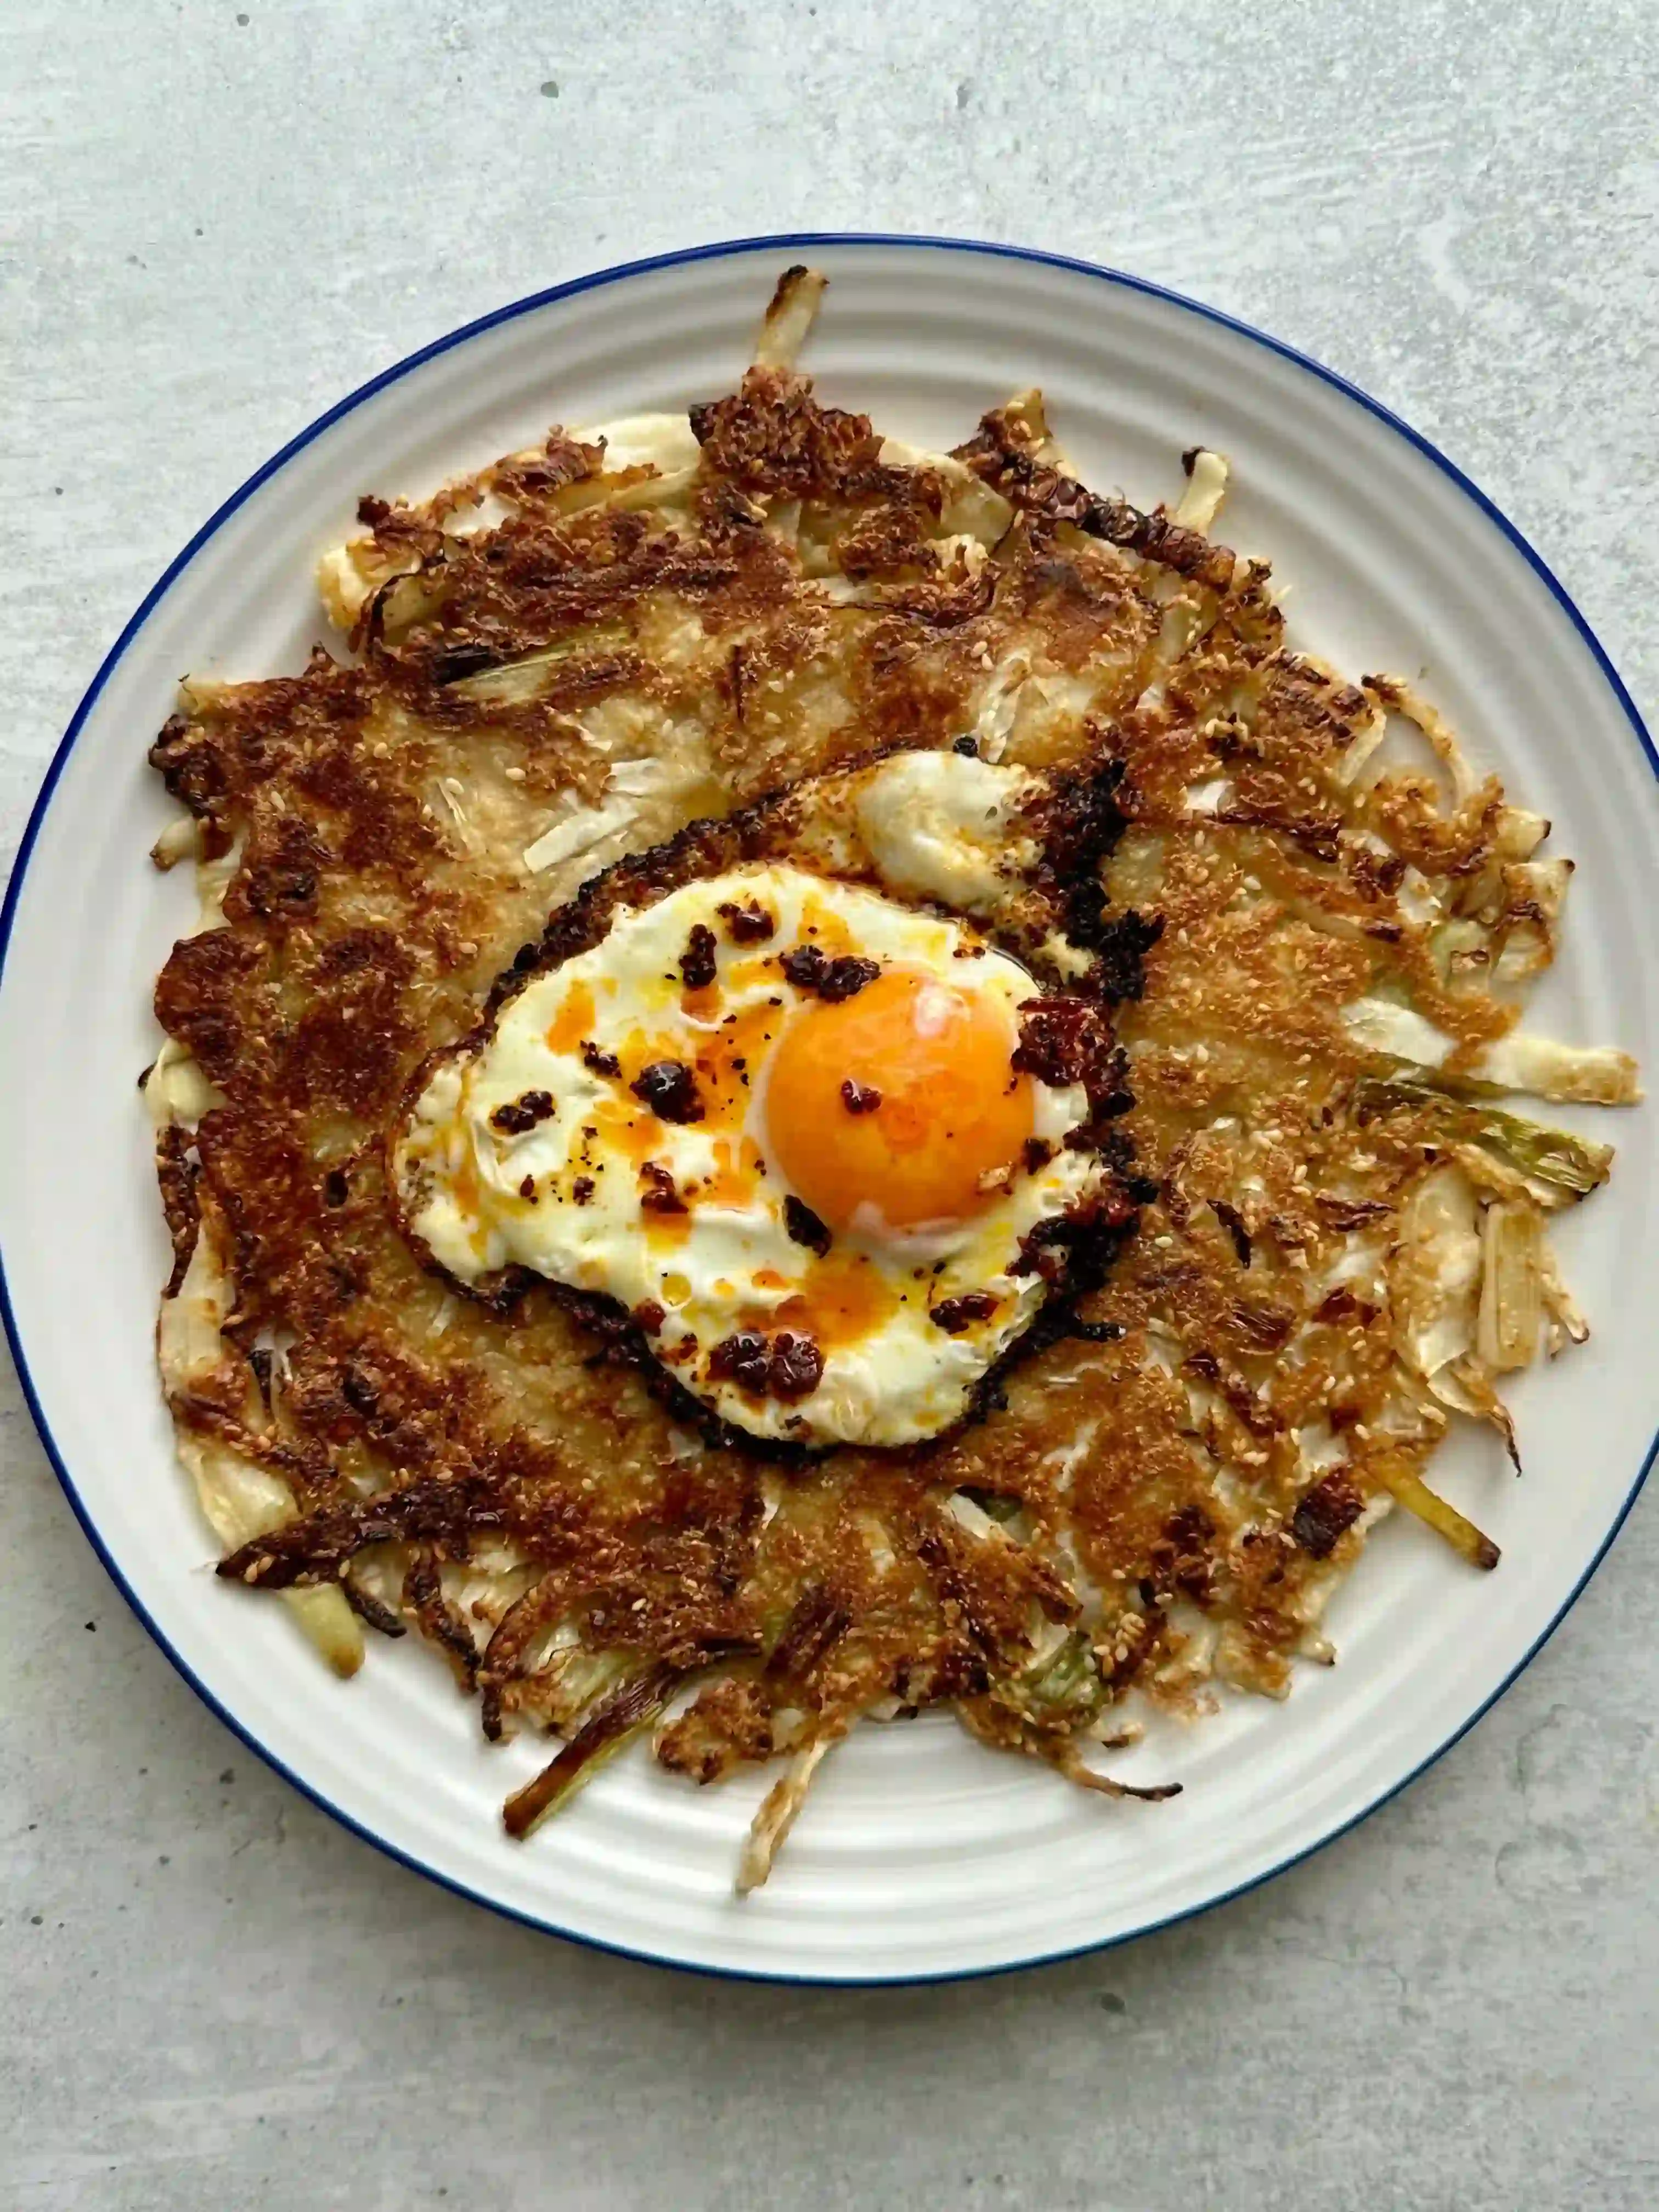
Vegetable Pancake with a Chilli Crisp Egg
This vegetable pancake has its origin in Korea (where they’re known as yachaejeon) and is the perfect dish to use up odds and ends of any vegetables you have lying around. Cabbage, spring onions, carrots and courgettes work really well and provide a nice balance of moisture and crunch, but peppers, potatoes, mushrooms or leafy greens are good alternatives. Depending on the vegetables you use, you may need more or less water to make the light batter so adjust as necessary.
Prawn & Mango Salad
The perfect fresh, but still flavourful, summer salad! This is a beautiful fragrant salad with a creamy, zingy coconut milk dressing. With just a little bit of chopping and a minute of whisking, you’ve got a gorgeous summer lunch, perfect for working from home, taking lunch to the office or a sunny meal in the garden this weekend.

Some big praise!
Take a look at what some of my happy customers have to say about "One Pot, One Portion"!
"One Pot One Portion is, to borrow from The Parent Trap “a brilliant beyond brilliant idea”…I know many feel that it’s too much bother to cook ‘just’ for themselves — a sad admission, I feel — and to those people, and many others besides, I say: get this book and prove yourself liberatingly wrong!…Thank goodness for books! And thank goodness for Eleanor Wilkinson, a young talent to lift the spirits…There are so many people who could benefit from this book…this book is a boon and a blessing"

"A genius approach to bringing joy to every meal, Eleanor gets that good food is the best form of self-love."

I buy a lot of cook books and this is genuinely one of the best l've ever bought. I've tried 6 or 7 recipes so far and they're all winners. I'm well used to scaling recipes down to one portion, but not having to calculate measurements as l go along feels like a little luxury. One of the best things about the book is that all the recipes are actually cooked in one pot - in a lot of other so-called books you still have to make your side dish in a separate pot. With these recipes, even if they include rice or pasta, it's all cooked together. No mountains of washing up! Highly recommended.

I have been following Eleanor on IG for a while and have made several of her dishes before the cookbook came out. I was thrilled to see so many new things to try and have already made about 6 of them. Her recipes are approachable, the dishes are delicious, and they make me feel like I can cook! Highly recommend.
If you love eating good home cooked food but can't be bothered to cook just for yourself, then this is the book for you. Using ingredients that are easy to find, then mixing, cooking and eating from the same pan or dish means a minimum of washing up. Every recipe I have tried so far has been delicious and have all turned out well which isn't always the case with many cookery books. Definitely recommend!
Following Eleanor on Instagram and seeing her recipes come to life is one thing but then having them in my own kitchen is quite another. Not only are the recipes easy to follow and delicious she also help you not to waste food. This book is like having all your favourite foods in one place with the added bonus of an old friend showing you the ropes. Congratulations Eleanor when can I pre-order the next one?
Bought this for my sister who cooks for one. She absolutely loved it finding it inspiring! So many great recipes to motivate and keep you cooking when it's just you eating!
Follow Eleanor on socials and knew I NEEDED this book immediately! SO glad I paid extra and had it shipped from the UK (to US). Eleanor's voice is loud and clear in every recipe. The pictures are beautiful, the instructions are perfectly clear, and I want to make EVERYTHING. I cannot recommend this book enough!
This is perfect, as far as influencer chefs go, I find this book refreshing in what has become a cohort of lauded influencers who really aren't doing much more than the bog standard meals most people make anyway, or making googled recipes and adding their own "flair". This book is different as it's your normal fare you'd likely make yourself, given a little bit of a twist to speed up the process / use less utensils / ingredients / food waste, in really creative and tasty ways, all perfectly portioned for one.
Great present! Bought this for my sister who cooks for one. She absolutely loved it finding it inspiring! So many great recipes to motivate and keep you cooking when it's just you eating!
Great present! Bought this for my sister who cooks for one. She absolutely loved it finding it inspiring! So many great recipes to motivate and keep you cooking when it's just you
Follow Eleanor on socials and knew I NEEDED this book immediately! SO glad I paid extra and had it shipped from the UK (to US). Eleanor's voice is loud and clear in every recipe. The pictures are beautiful, the instructions are perfectly clear, and I want to make EVERYTHING. I cannot recommend this book enough!
This recipe book is stunning and fulfils its role brilliantly in catering for individuals who want to eat delicious meals, but don't want to prepare family sized portions or devote their entire evening to cooking. Who'd believe you could make an entire roast for one person and only use one pan in the process! She is a genius and I couldn't recommend this book any more highly.
One of the best things about the book is that all the recipes are actually cooked in one pot - in a lot of other so-called books you still have to make your side dish in a separate pot. With these recipes, even if they include rice or pasta, it's all cooked together. No mountains of washing up!
This is the book I've been waiting for! I (very happily!) live alone, love to cook and read cookery books, but every recipe is for two people or more. This gorgeous book contains recipes perfectly proportioned for one person (and I'm always a very hungry one person!) which ensures more variety, less food waste, and pure, gluttonous joy.
It's so nice to finally have a recipe book that I can go to if I want a quick easy meal with minimal cleaning up required! Everything l've tried so far is delicious. And I salivate at the thought of everything in there!
Totally reignited my cooking mojo which had been MIA for a while. I'm going to buy my daughter a copy to take back to Uni too as everything is simple and delicious - perfect for a student!
Best cookbook for somebody single!
The fact I know I won't have loads to wash up really feels motivating and l've earmarked so many of the recipes already.
This book is like having all your favourite foods in one place with the added bonus of an old friend showing you the ropes. Congratulations Eleanor when can I pre-order the next one?